Changing out a light switch for a combination outlet and switch
Disclosure: This blog is a participant in the Amazon Services LLC Associates Program as well as other affiliate programs, designed to provide a means for me to earn fees by linking to Amazon and affiliated sites at no extra cost to you. Please see the full disclosure for more details.
Time needed
Materials
The story
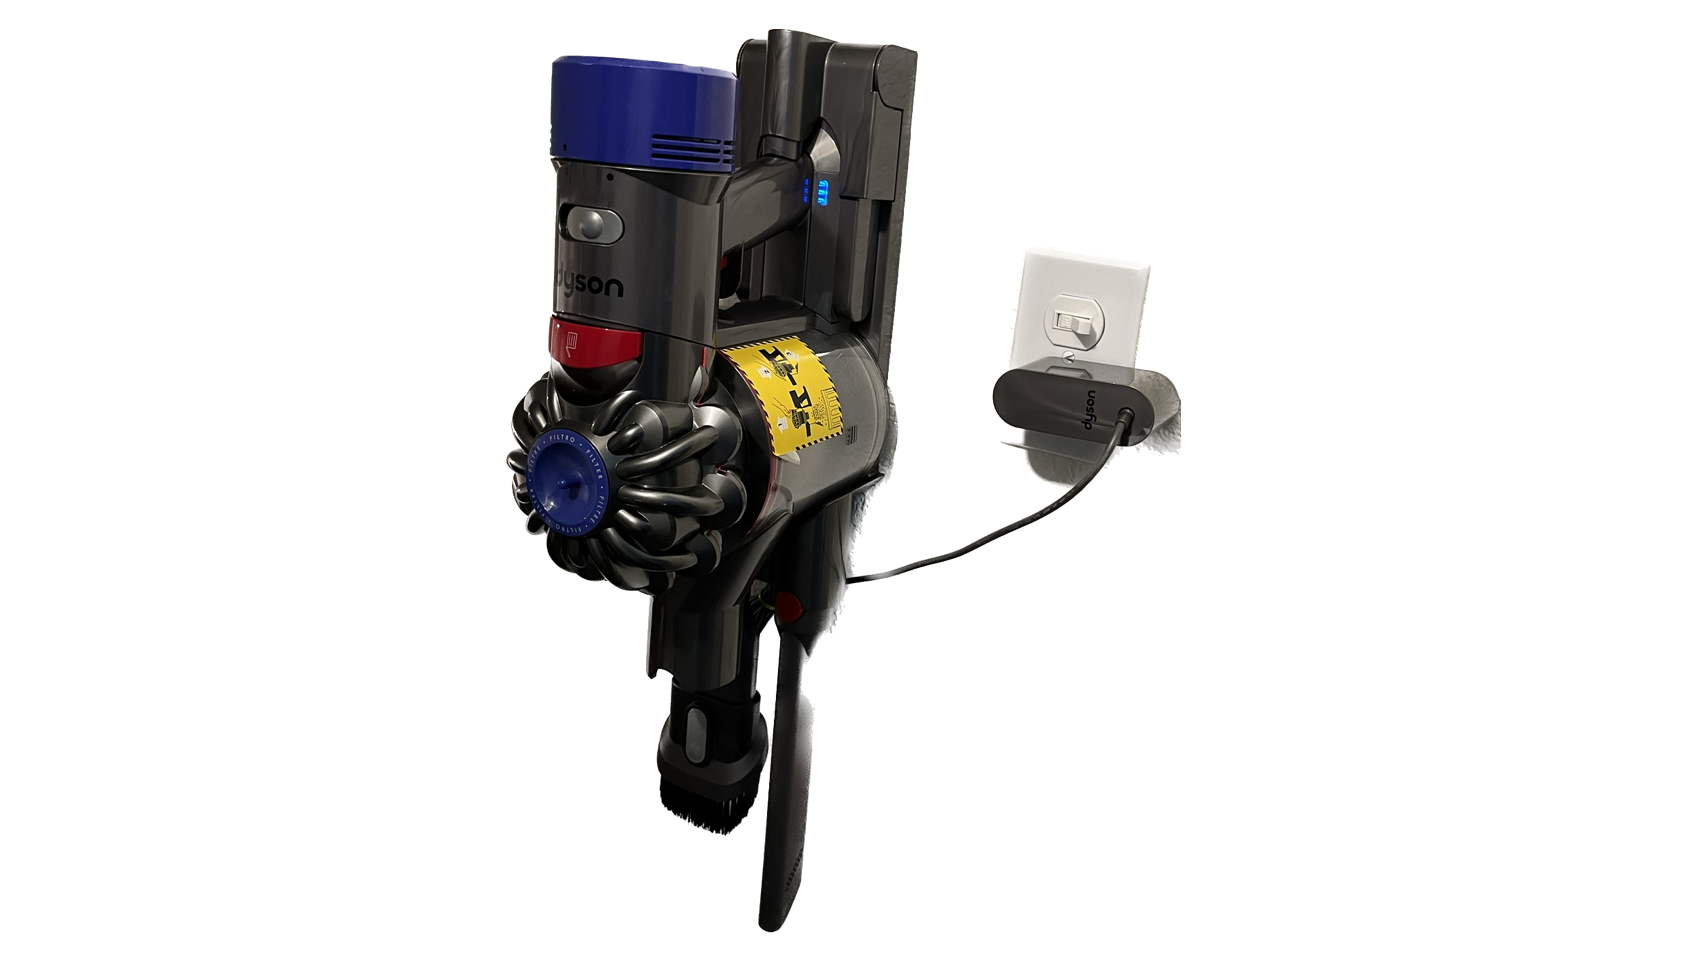
Ever wish you had an outlet somewhere far from your existing outlets? In my case, I wanted to put my vacuum cleaner in the closet, and have it be able to charge while it was in there. Sure, I could call an electrician to lay new wiring, but who knows how much that would cost. (Or I could run an extension cord in, but that ruins the aesthetic of the house). Fortunately for me, I have an light switch in my closet, so I searched the web for a way to leverage that, and I came across the combination switch and outlet.
The concept behind this is quite simple — instead of just having electricity go through the switch in order to control something (in my case, a light), the current also goes in to power the outlet.
The installation
⚠️ WARNING: Touching a live wire can kill or seriously injure you. If you are unsure or uncomfortable about any part of the installation process, contact an electrician.
You don’t need to be electrician to do this, but you should have some basic knowledge on how electrical wiring works.
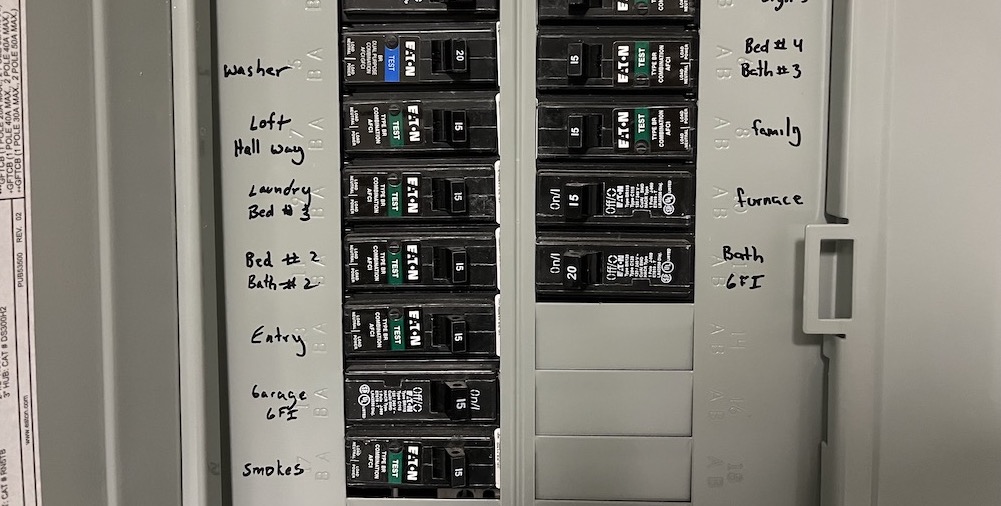
Turn off the power
Before we start, make sure you’ve turned off the power. Go to the circuit breaker and find the corresponding breaker to that part of your home (hopefully it’s labeled well, otherwise it’ll be trial-and-error — flip on the switch where you’re doing the installation and try each breaker switch until the power to the switch goes off). Flip the circuit breaker switch off.
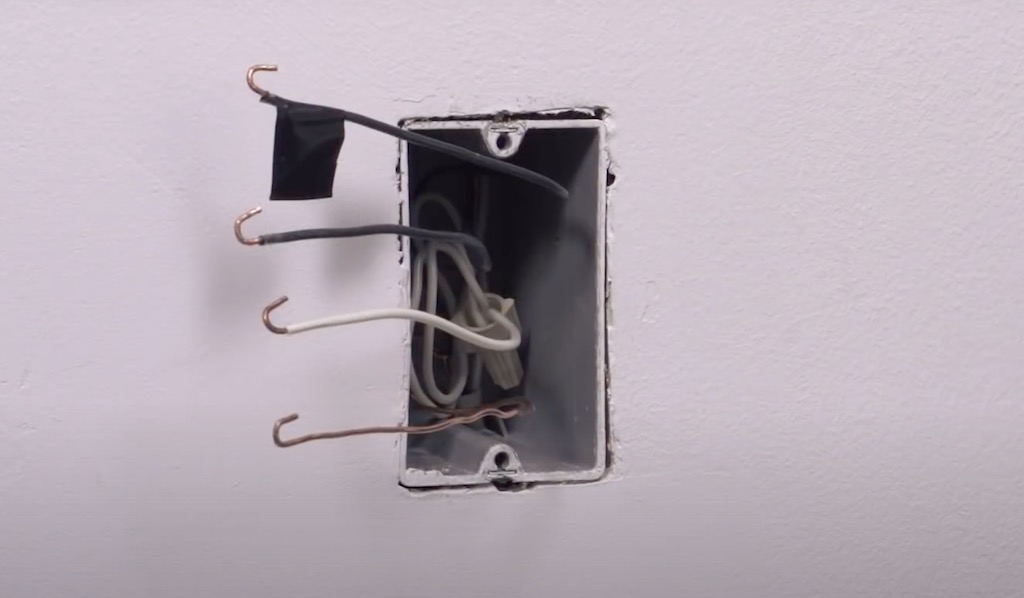
Remove the existing switch
Next, use your screwdriver to carefully remove the cover from your light switch. Unscrew the screws holding in the existing switch. Pull out the switch, and then take note of which is the load, which is the line. If it’s not labeled, you might need to get a voltage tester to verify (watch this to see how). Separate the wiring from the old switch (having a pair of needle nose pliers is useful here), and ready the wires for installation. Note: you should have at least one hot, one load, one neutral, and one ground wire.
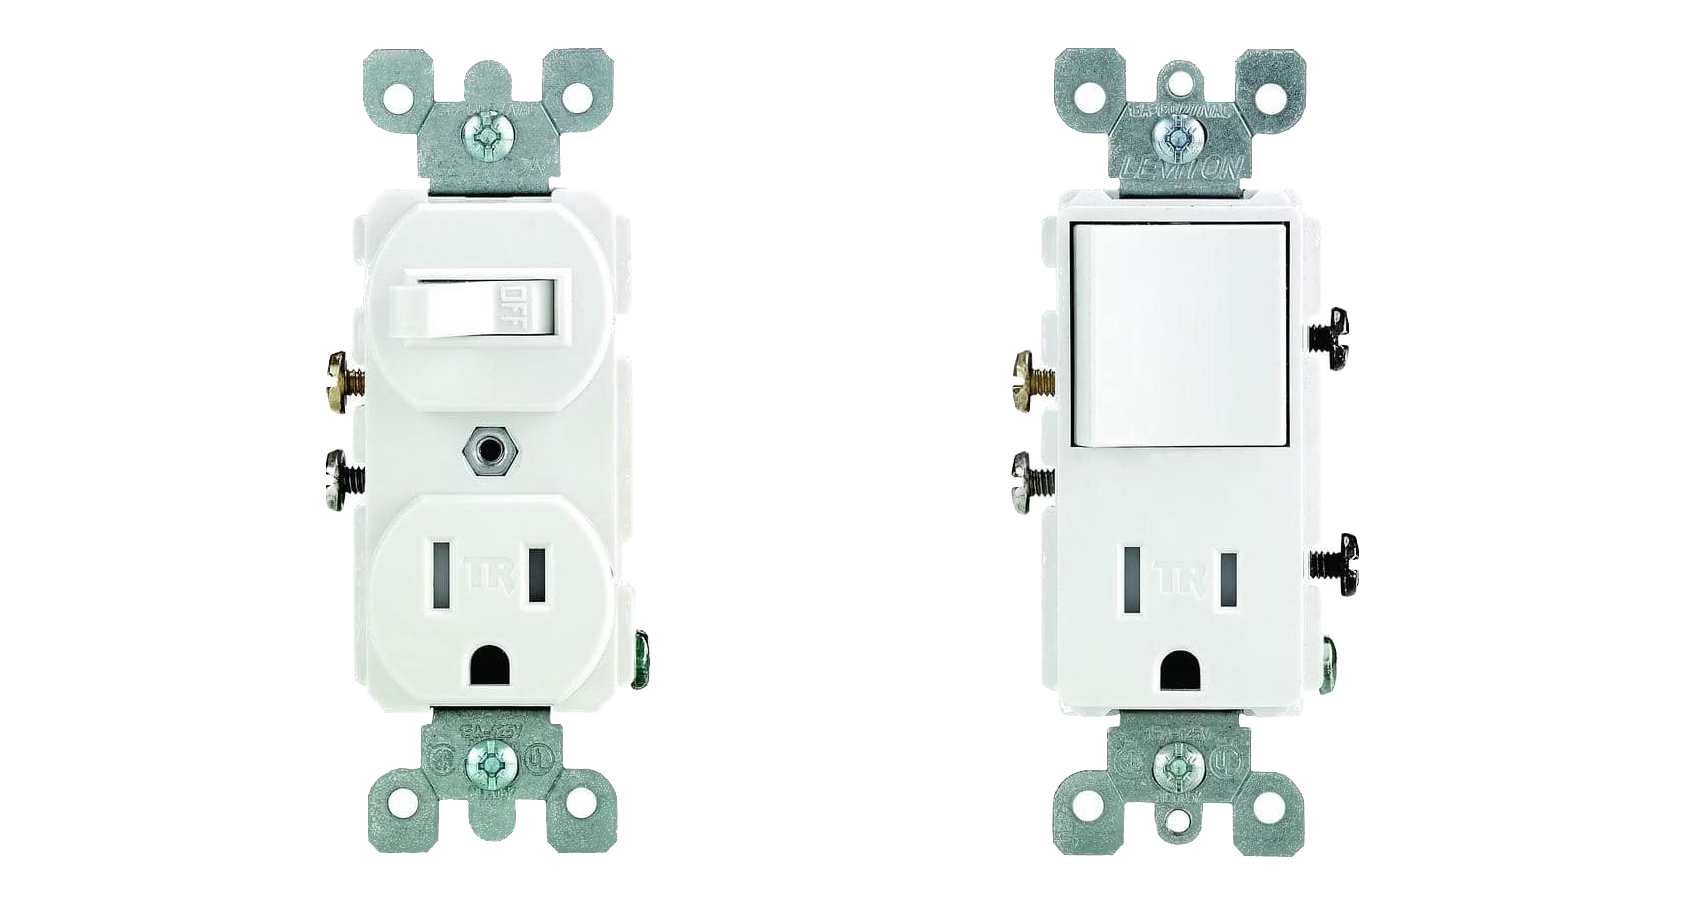
Install the combination outlet and switch
Now all we need to do is install the combination outlet and switch! The video mentioned above is actually very useful to see the various ways the combination outlet and switch can be wired in. In my case, I wanted to have the outlet always on (so that the vacuum could charge), and the switch should maintain the same behavior (turns on/off the light). To do this, there’s two ways (depending on the number of wires that you have available). In my case, the wiring I had available was 1 hot (black), 1 load (black), 1 neutral (white), and 1 ground (bare copper). Wiring instructions for this configuration can be found at 3:46. The wiring looks like this:
Hot --> Black "common" screw
Load --> Brass "A1" screw
Neutral --> Silver "N" screw
Ground --> Green screw
If you have two hot wires and want to this same thing, but on separate feeds, start watching at 6:21.
Other ways of wiring this together are:
- The switch controls the outlet (switch flipped off == outlet off): start watching at 2:48. To be honest though, if you want to do this, I’d suggest just buying a switch like this one from Amazon or this one from Kasa, and plug that into the outlet. You’ll be able to turn on/off the thing plugged into the outlet manually, with your phone, and with your smart home.
- The switch controls both the light and the outlet (switch flipped off == light off AND outlet off), start watching at 5:05
Once you have the wires connected to this new combination outlet and switch, screw this back into the wall and reattach the wall plate.
Celebrate!