Painting on a layer of epoxy to the floor of a garage to make it pretty and easy to clean
Disclosure: This blog is a participant in the Amazon Services LLC Associates Program as well as other affiliate programs, designed to provide a means for me to earn fees by linking to Amazon and affiliated sites at no extra cost to you. Please see the full disclosure for more details.
Time needed
- ~2-4 days, around 1-2 hours each day
Materials
The story
Ever seen those speckled coated garage floorings in really nice homes?
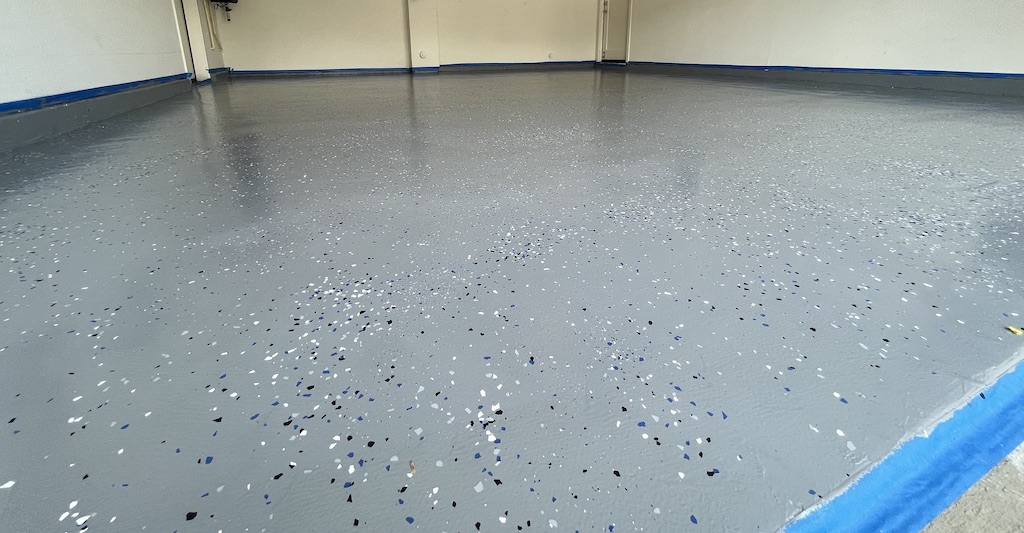
Not only are they more aesthetic, but coated garage floors are also easier to clean. To have this done professionally would cost thousands of dollars, but there are products like the Rust-Oleum EpoxyShield Garage Floor Coating Kit, which is what I used, that are much more affordable. The difference between DIY and professional coatings is usually how good it looks and how long they last. When done right, the look should be similar. I’ve yet to time-test the durability of the DIY solution, so keep that in mind when deciding whether to do it yourself. I ultimately chose to go down the DIY route and hope that the coating will last for years to come.
Prep and clean the floor
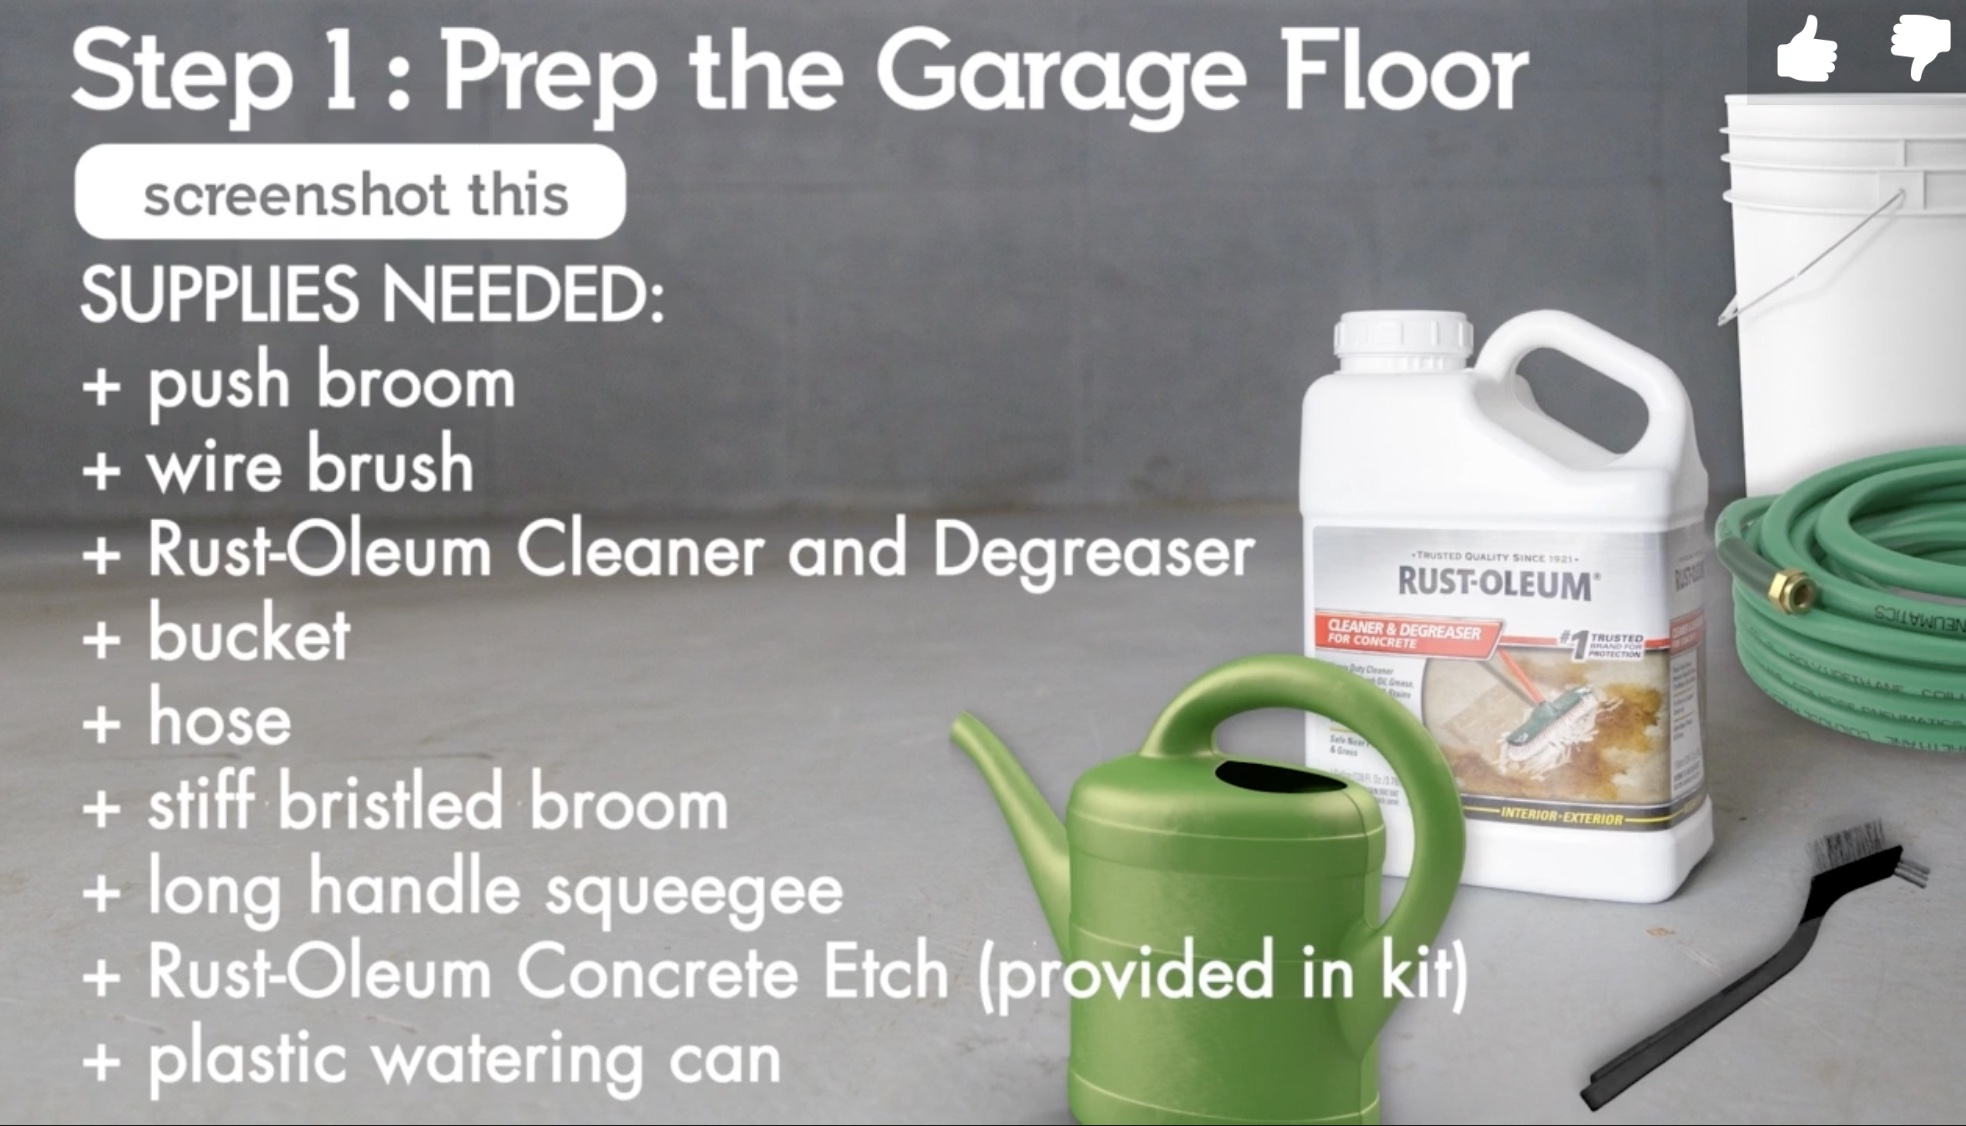
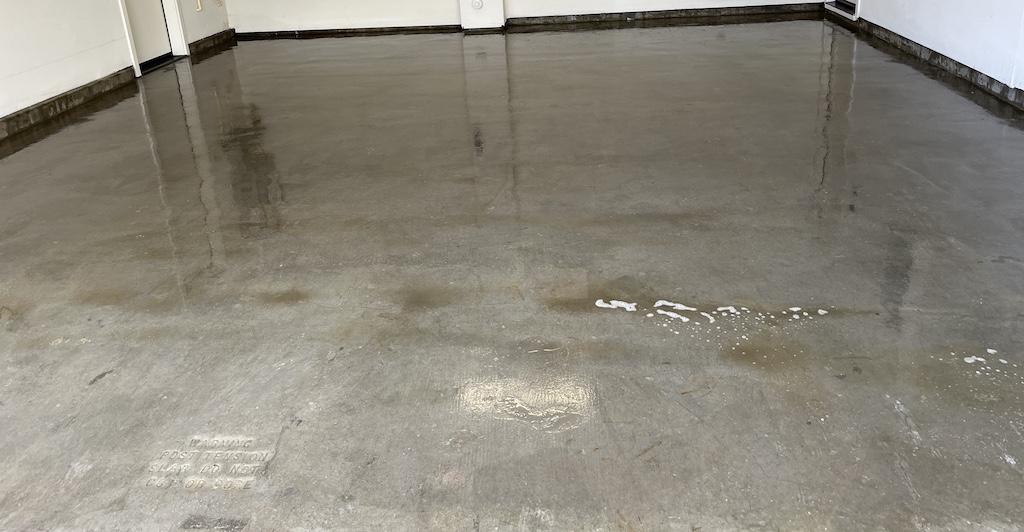
This is the hardest and most time consuming part. First, empty the garage of everything so that every square inch of the flooring is accessible. I did this project right before I moved in, to take advantage of the opportunity when the garage would be empty. After the concrete floor is fully exposed, sweep thoroughly with a broom or a push broom. Next, wash the flooring. A hose might be enough, but I would recommend using a pressure washer, especially if the garage has seen it’s share of action. If there are oil spots or other heavy stains, you might want to use some concrete cleaning solution. Pour the solution onto the stain either as is (or diluted if the stain is light), and let is soak for around 20 minutes, then scrub vigorously with a wire brush. Scrape off any other gunk that may be on the concrete. Rinse off the cleaner, and use the long handled squeegee to push the water out of the garage.
Once the concrete if fully cleaned, it’s time to do the etching. Etching is a chemical process that opens the pores of the surface and allows the epoxy layer to better adhere to the concrete. There is a pack of powder included in the kit — this needs to be mixed with water to form the etching solution. A full bag mixes with 2 gallons of water. You can either get a large watering can to do this, but I just used an old milk jug and used half a bag at a time. Be sure to wear gloves for this. Working section by section, pour the solution on exposed concrete and use that wire brush to give it a good scrub. The area should fizz, and once the fizzing stops, rinse off the area with clean water while scrubbing the areas you etched. Scrub and rinse at least 3 times to make sure there’s no more solution left on the surface. Use the long handled squeegee again to make the floor as dry as possible.
Wait 24 hours.
Repair
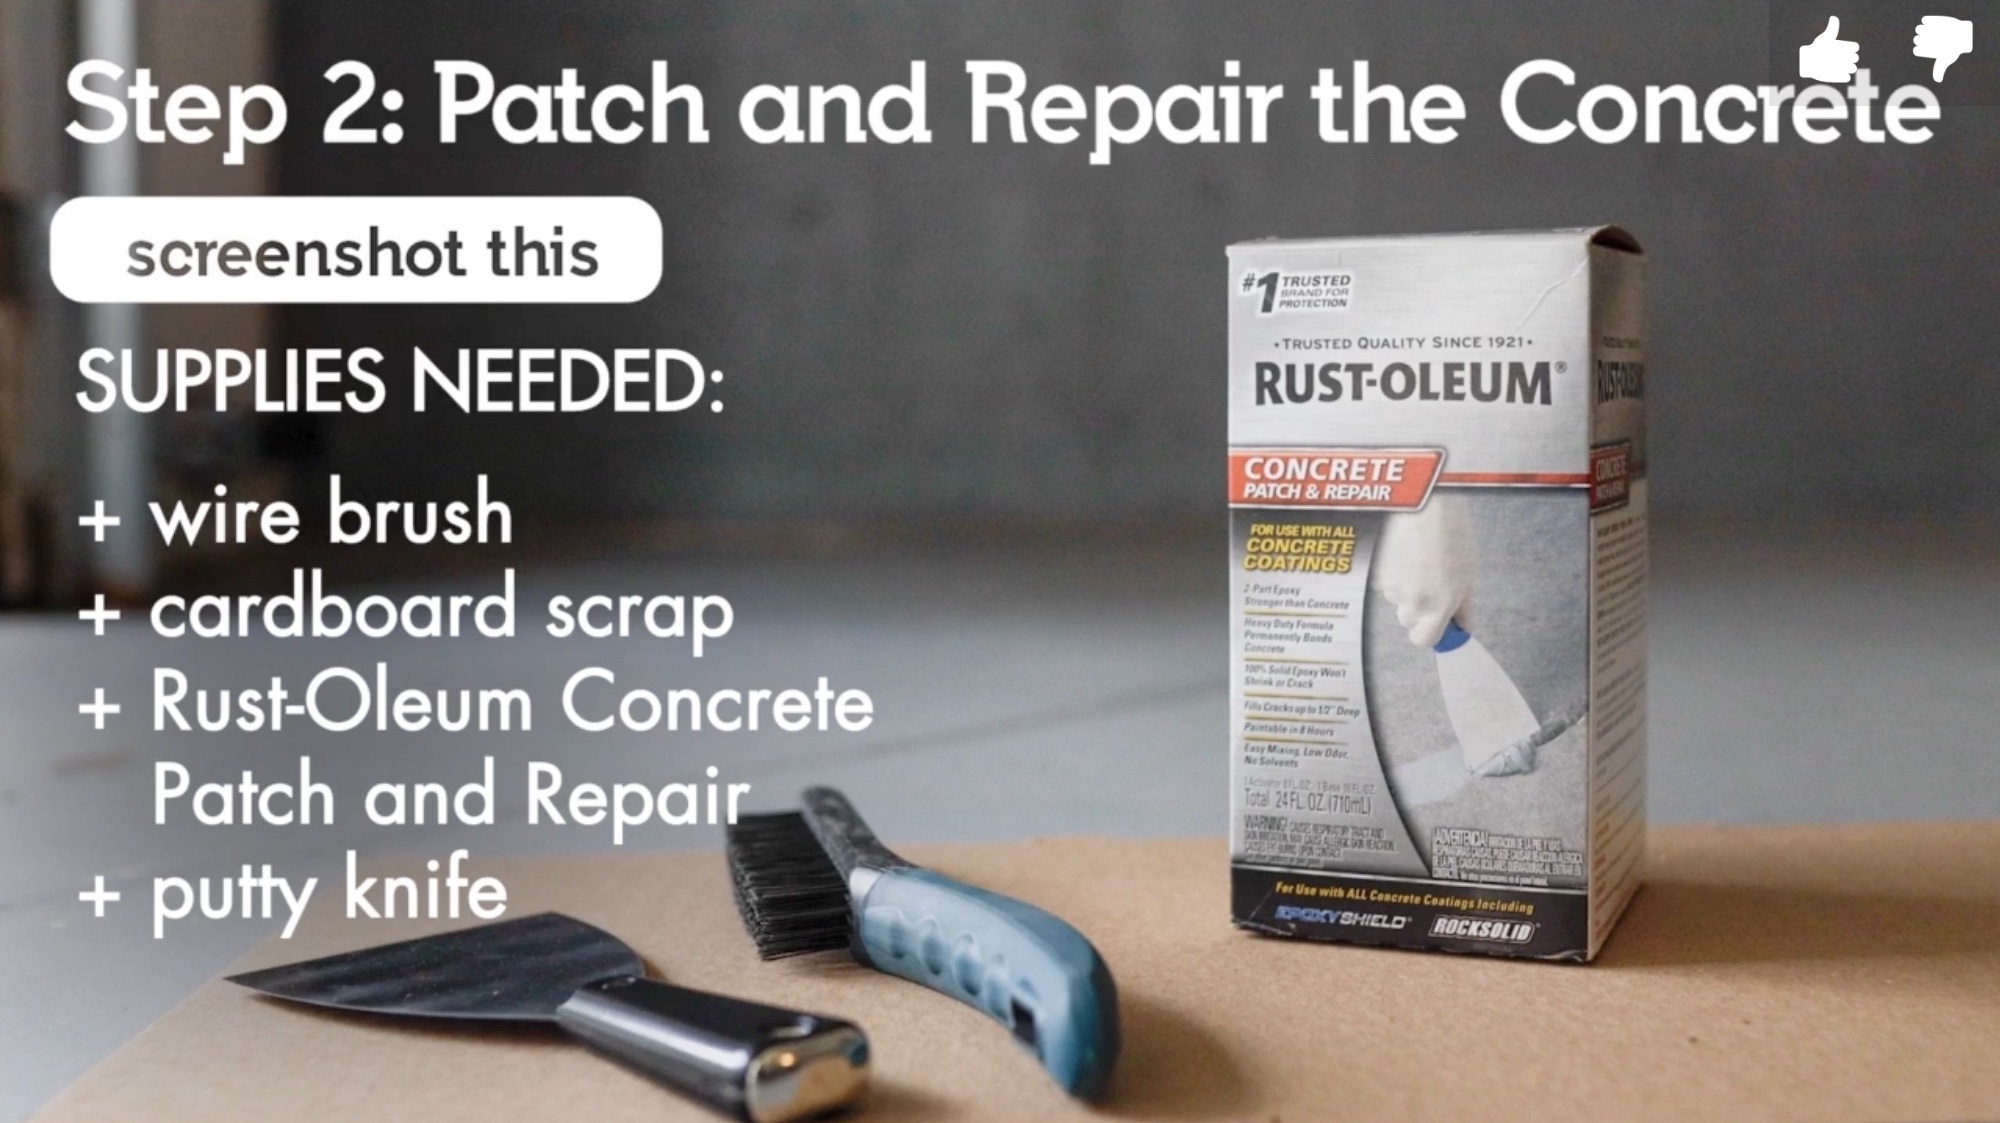
This step is only necessary if you have cracks in your concrete. I skipped this step, but here are some insights based on some videos I’ve watched.
The Rust-Oleum patch and repair kit is a 2 part epoxy that creates a solution stronger than concrete. Mix the two parts following the instructions (2 parts Base (b), 1 part Activator (a)) on a piece of cardboard. The epoxy will harden, so only mix what you will use in the next 10-20 minutes, and mix until the solution has a putty-like consistency. Spread the epoxy on cracks and use the putty knife to smooth the areas out.
Wait 8 hours.
Apply Primer
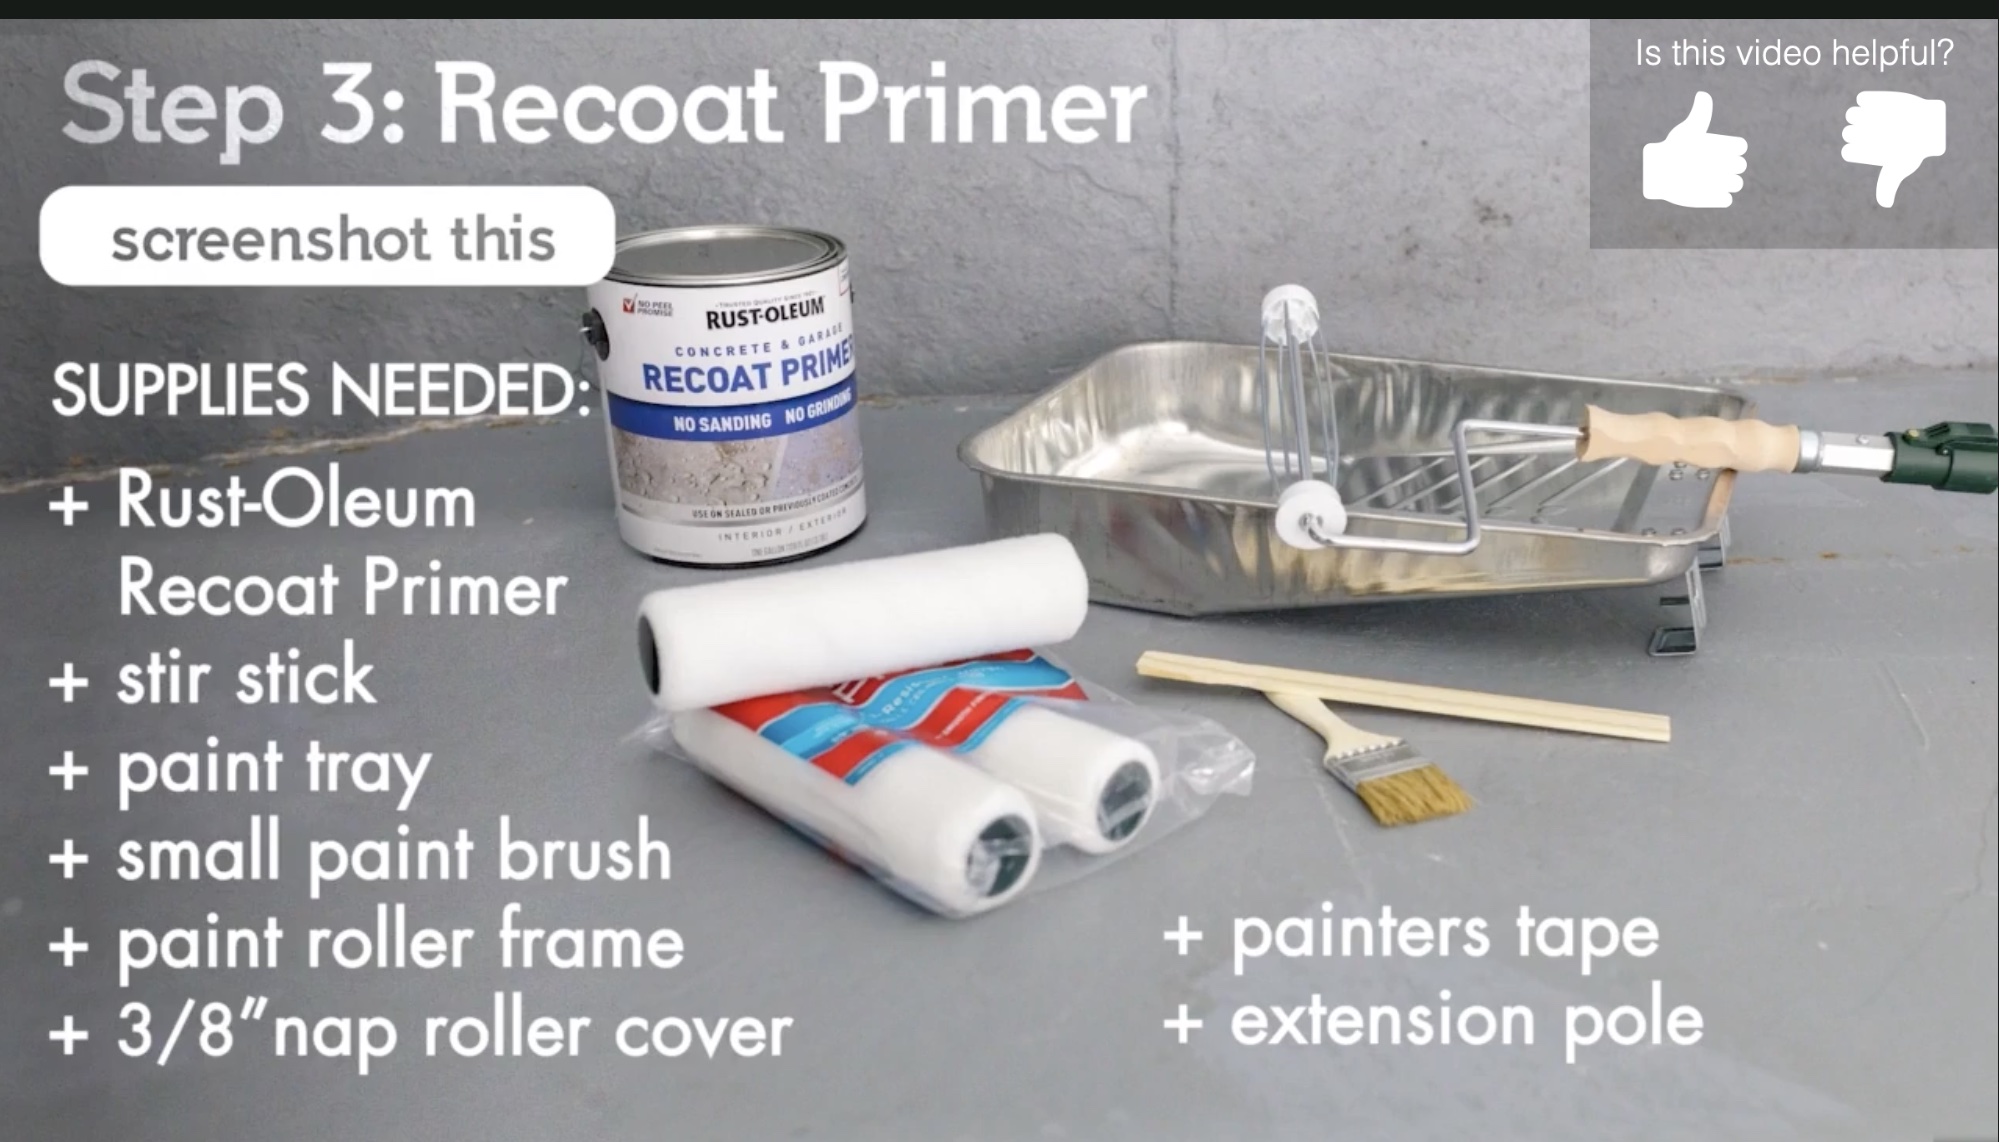
This step is only necessary if your garage floor was previously coated and you’re not working with bare concrete. Again, I skipped this step, but here are some insights.
Before starting, use painter’s tape to tape up any areas of the wall that touch areas of concrete that you will be painting.
The Rust-Oleum floor primer can be used to allow the epoxy to bind to previously coated flooring. Stir the primer thoroughly, and then working in small sections, use a small brush to paint the edges of the garage. Make sure you start from the inside of the garage and work outwards so you avoid stepping on painted areas. Using a roller, roll the primer onto the rest of the flooring.
Wait 6 hours.
Apply Epoxy
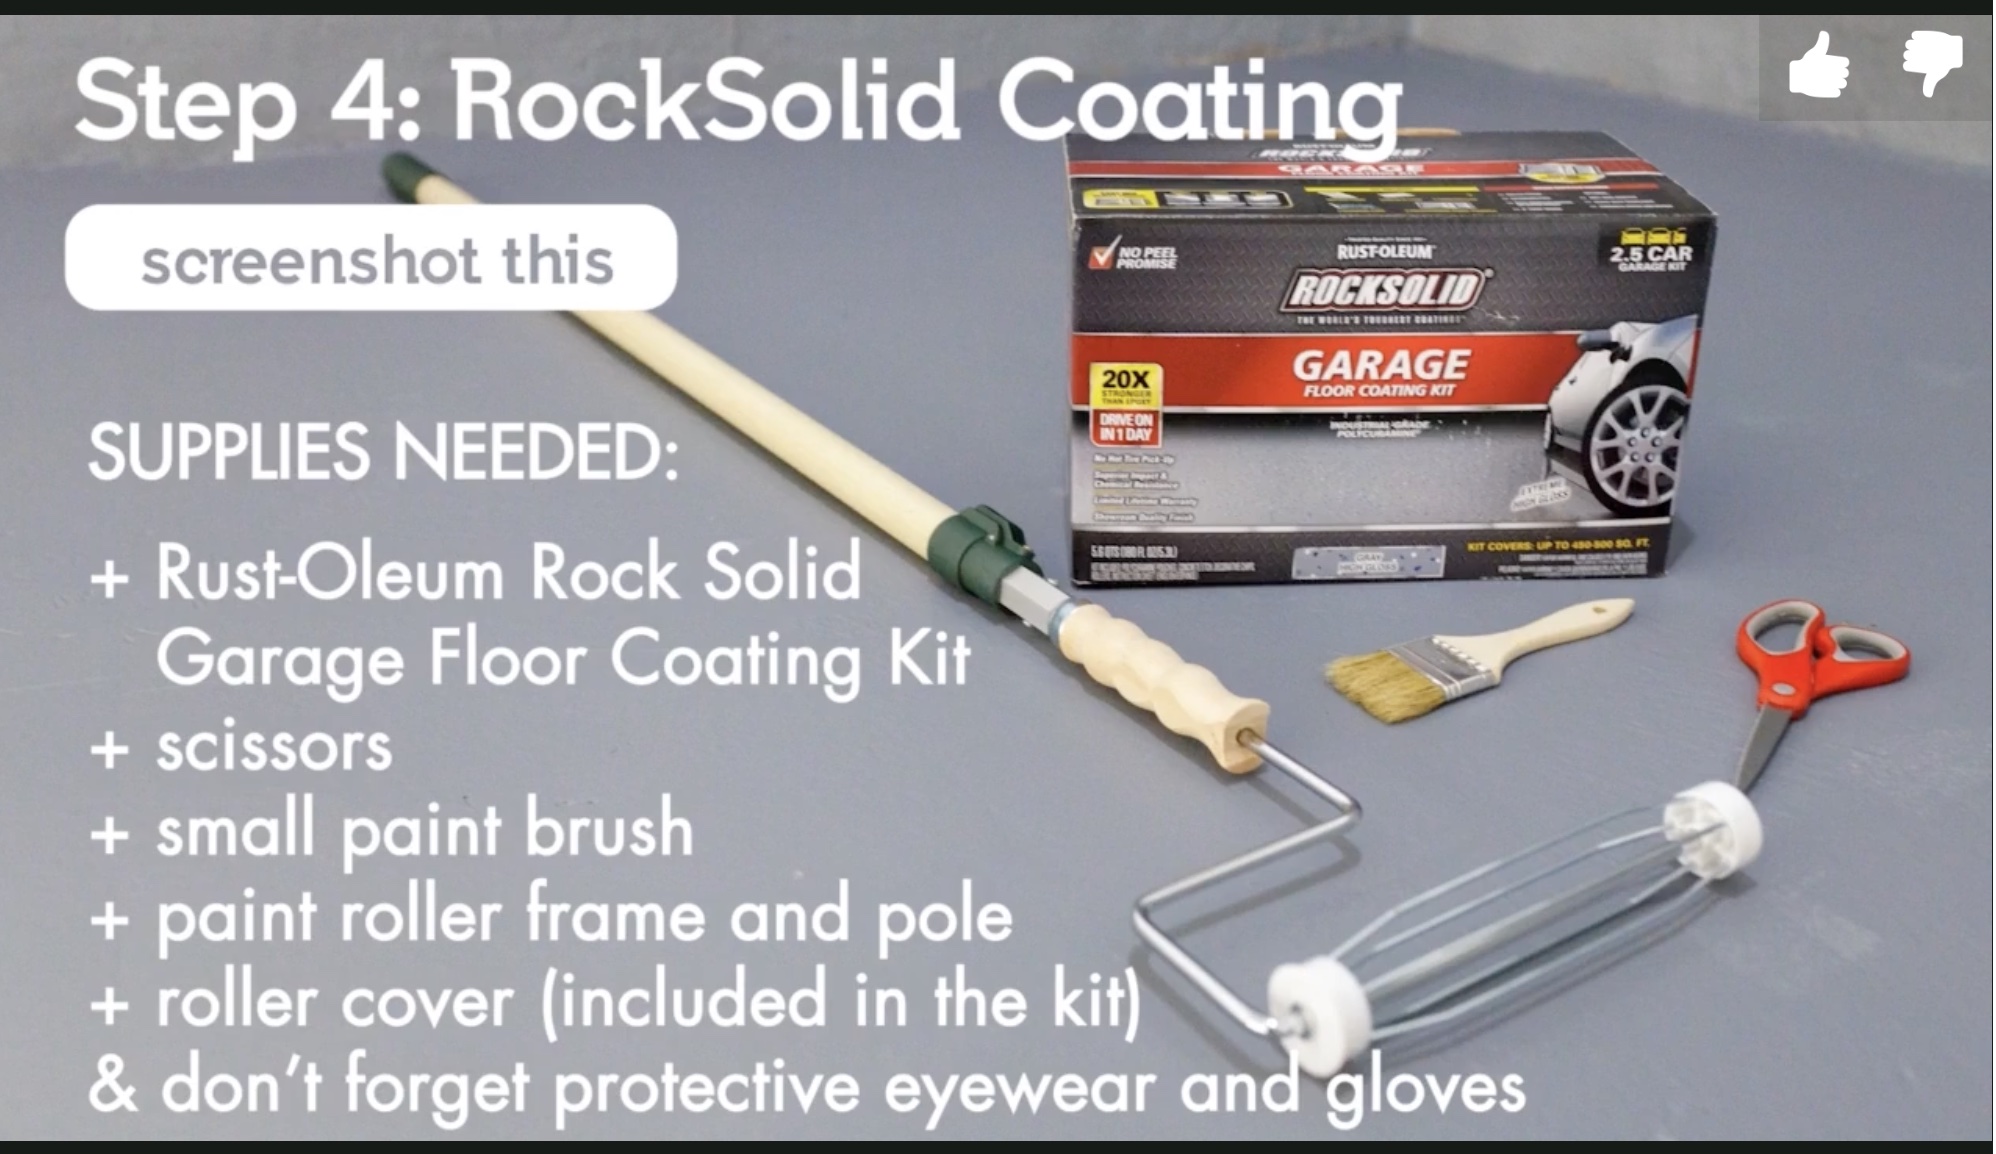
If you skipped the primer step above, make sure you use painter’s tape to tape up any areas of the wall that touch areas of concrete that you will be painting.
Some kits will come with a foam roller — mine did not, so I purchased an epoxy paint roller (note that the roller is meant specifically for epoxy, and will be more shed-resistant).
Wearing protective gloves, mix both sides of the pouch provided in the kit and then burst the pouch by rolling side A into side B, and mix for another 2 minutes. You’ll have one hour to complete the project once the pouch has been mixed. Cut a little corner off the pouch to open, and then pour it directly onto the floor, in roughly 4 foot ribbons. Working in sections, trim the sides using a paint brush and roll out the epoxy. Work your way from the back of the garage, careful not to paint yourself into a corner. Once each section is complete, toss the decorative chips (make sure the paint is still wet when you do this). Leave a 1 foot section of epoxy without the chips so that you can evenly distribute the next section. Continue this until you’ve covered the whole garage.
Wait 8-12 hours before foot traffic, 1-2 days before vehicle traffic.